

Event Photography Lighting Considerations: A Field Guide
Expose for the ambient first, then add low-power, gelled flash as fill. That single habit resolves the majority of event lighting problems you’ll face at weddings, corporate conferences, and receptions across North America.
Before you walk in the door, confirm these five things:
- Scout ceiling height, color, and wall reflectivity at the venue
- Set a manual Kelvin white balance (or shoot a custom WB frame) for each lighting zone
- Pack two speedlights, a half-CTO gel set, and a small off-camera stand
- Load your camera to manual exposure with Auto ISO capped at 6400
- Carry spare batteries, extra radio triggers, and at least two backup memory cards
Bounce flash and low-power fill produce more natural, editorial-quality images than direct on-camera flash. The Professional Photographers of America (PPA) consistently emphasizes preparation and technical mastery as the foundation for working in unpredictable lighting environments. The sections below give you the full system: venue scouting, gear selection, on-site recipes, and post-processing workflow.
Table of Contents
- What are the key event photography lighting considerations before you arrive?
- What lighting equipment do you actually need for events?
- How do you plan and prepare lighting logistics before the event?
- What are the best on-site lighting techniques and exposure recipes?
- How do you handle lighting for specific event scenarios?
- How do you work with clients, AV crews, and guests without disrupting the event?
- How do you correct mixed lighting in post-processing?
- JFPhotos real-world setups: two case studies with timing and costs
- Key Takeaways
- What JFPhotos does differently with event lighting
- Hire a photographer who handles lighting so you don’t have to
- Useful sources and further reading
What are the key event photography lighting considerations before you arrive?
Venue scouting is where reliable event lighting starts. Walking in cold and improvising costs you the first 20 minutes of a shoot. A 30-minute scout, or even a phone call with the venue coordinator, gives you a lighting map you can act on.
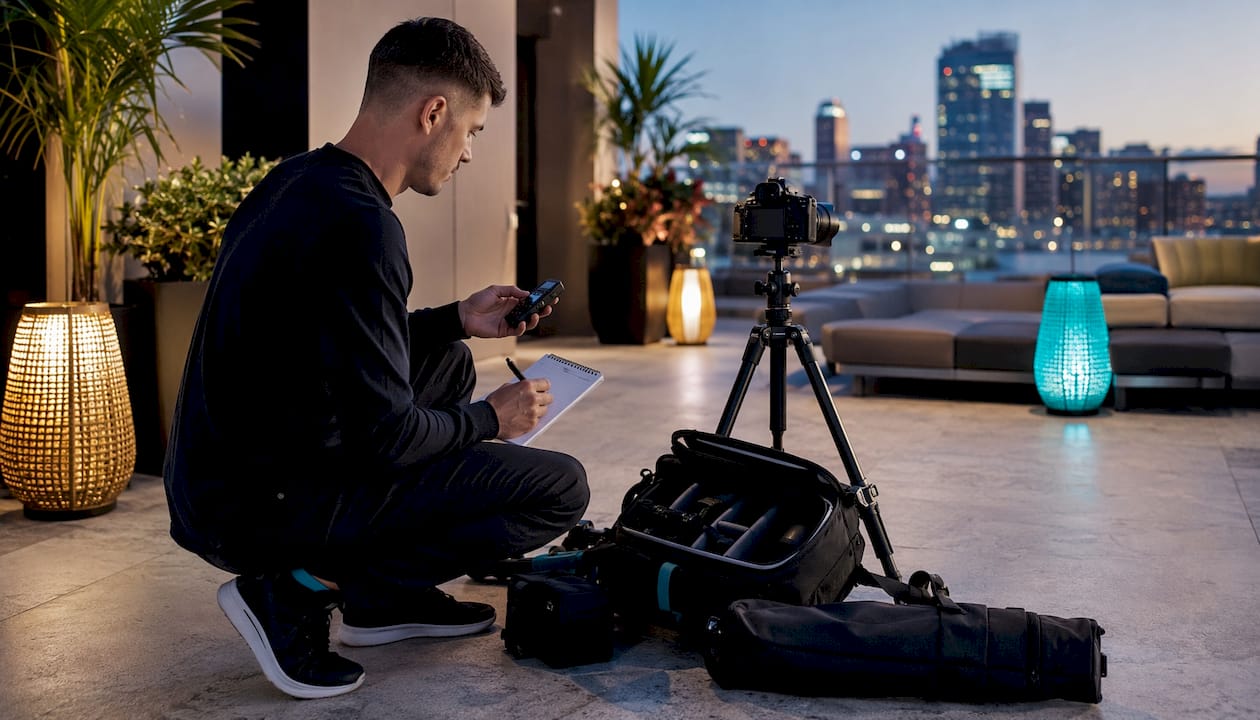
What to log during a scout:
| Factor | What to Measure / Note |
|---|---|
| Ceiling height and color | Low white ceilings = ideal bounce; high or dark ceilings = off-camera required |
| Dominant light sources | Tungsten, fluorescent, LED, daylight windows, or stage fixtures |
| Window direction | East/west orientation affects color temperature shift during the event |
| Wall colors and reflectivity | Warm walls add cast to bounce flash; dark walls absorb it |
| Power access | Number of outlets, circuit load, distance from setup zones |
| AV/LED stage fixtures | Note color temperature and whether they are dimmable |
| Rigging or truss points | Available for off-camera light placement |
Take test RAW frames in each zone. Common Kelvin ranges you’ll encounter: tungsten chandeliers sit around 2700–3200K, LED uplighting varies from 3000K to 5600K depending on the fixture, and fluorescent overheads often land near 4000–4500K. Mixed zones, where tungsten and LED share the same frame, are the hardest to manage. Setting a custom white balance for each distinct lighting zone, rather than relying on Auto White Balance, is the professional standard.
When you talk to AV staff, ask three specific questions: “Will you be dimming the house lights during speeches or presentations?” “Are there any broadcast-sensitive moments where strobes are restricted?” “Can I place a light stand near the stage perimeter during setup?” Those three answers shape your entire lighting strategy before a single guest arrives.
Use your scout notes to lock in a default white balance, decide which gels to pre-attach to your speedlights, and identify two or three anchor positions for portable lights. The time you spend logging this information pays back every time you need to make a fast decision mid-event.
Pro Tip: Photograph a gray card in each lighting zone during your scout. Save those frames in a dedicated “WB reference” folder. In post, you can use them to set a precise custom white balance for each gallery zone without guessing.
What lighting equipment do you actually need for events?
The right kit balances coverage, redundancy, and portability. Here is how to think about it across three budget tiers.
Core carry kit
- Two speedlights (Godox V1, Profoto A10, or equivalent) with TTL and manual control
- One small battery-powered monolight or AD-style unit (Godox AD200 Pro or similar) for off-camera key work
- Wireless radio triggers with TTL pass-through (Godox X2T, PocketWizard, or brand-native)
- Small softbox, shoot-through umbrella, or octabox (24–36 inches) for the monolight
- Half-CTO, quarter-CTO, and full-CTO gel sets; one set pre-cut per flash head
- Bounce card or Rogue FlashBender for on-camera fill
- Spare batteries: at least two sets per speedlight, one fully charged monolight battery pack
- Two extra radio trigger receivers
Carrying at least two speedlights is standard professional practice because flash units overheat during long events and batteries fail at the worst possible moments. A single-speedlight kit is a liability, not a budget choice.
Lens and camera choices tied to lighting
Fast primes change your ISO strategy significantly. A 35mm f/1.8 and an 85mm f/1.8 cover most event scenarios from wide environmental shots to tight candid portraits. Many working photographers add a 24–70mm f/2.8 zoom for fast-moving coverage where switching lenses is not practical. The wider the aperture, the lower you can keep ISO, and the less flash power you need to balance ambient. For a deeper look at how aperture, shutter, and ISO interact, the exposure triangle primer at JFPhotos is worth bookmarking.
Continuous LED panels are practical for sit-down portraits and tethered interviews, but bi-color 60W panels cannot replace flash for fast-moving dance floors due to lower output. Bring them for booth work and sponsor interviews; keep your speedlights primary for receptions. For a detailed breakdown of how continuous light performs in portrait scenarios, this practical guide on continuous light covers the tradeoffs clearly.
Budget tiers at a glance
| Tier | Key Gear | Approximate Investment | Best For |
|---|---|---|---|
| Entry | Two mid-range speedlights, manual triggers, shoot-through umbrella | — | Small corporate events, daytime receptions |
| Prosumer | Two speedlights + AD200 Pro, TTL triggers, 24" softbox, gel kit | — | Weddings, evening galas, conference keynotes |
| Full pro / rental | Two speedlights + two monolights or equivalent, stands, large modifiers, tethering kit | — or rental options | Large ballrooms, multi-room coverage, broadcast-adjacent events |
Renting beats buying when you need a larger monolight for a single ballroom event, when you are testing a modifier before committing to a purchase, or when traveling light is a priority. The JFPhotos event photography gear guide goes deeper on rental versus buy decisions for specific gear categories.
Pro Tip: Label every battery with a colored dot: green for fully charged, red for depleted. Swap colors after charging. During a four-hour event, you will never accidentally reach for a dead battery again.
How do you plan and prepare lighting logistics before the event?
Preparation is what separates a confident shoot from a reactive one. Build your pre-event checklist around four areas: shot priorities, coordination, run-sheet timing, and battery/media logistics.
Shot list and critical lighting moments
Start by identifying the moments that need extra light. Speeches and award presentations require clean, shadow-free coverage of a stationary subject. First dances and receptions need atmosphere-preserving fill. Headshot stations and sponsor booths need consistent, repeatable two-light setups. Map each moment to a lighting approach before you arrive, and note which require off-camera gear that needs setup time.
The JFPhotos corporate event photo checklist is a reliable starting template for coordinating shot priorities with planners and AV teams.
Coordinating with AV and venue staff
Request a lighting walkthrough during venue setup, ideally 45–60 minutes before guests arrive. Use that window to test your flash against the stage lighting, confirm dimming schedules, and tape cables. Ask the AV lead specifically about broadcast-sensitive moments: live streams and video recording setups can be disrupted by strobe timing conflicts. Schedule a five-minute test sequence during setup so you know your baseline exposure before the first guest walks in.
Run-sheet timing
Build these windows into your personal run sheet:
- Arrive 45–60 minutes early for setup, cable taping, and test shots
- 15 minutes before doors open: final test sequence, confirm triggers are syncing
- During event: note lighting changes (house lights dimming, AV transitions) and adjust
- Post-event: pack cables first, then stands, then flash heads to avoid damage
Battery and media logistics
Carry a minimum of two fully charged batteries per speedlight and one spare monolight battery pack. For a six-hour event, plan on cycling through at least one full set of speedlight batteries. Store charged spares in a dedicated pouch, separate from depleted ones. For memory cards, carry enough capacity to shoot RAW for the full event without swapping, plus one backup card per body. Never format cards until images are backed up to two separate drives.
What are the best on-site lighting techniques and exposure recipes?
The core workflow is simple: expose for the ambient first, then layer flash on top as fill. Starting at ISO 1600–3200 with a wide aperture, then adding flash at low power, prevents the “black-hole” background that plagues direct-flash event images.
Sample exposure recipes by scenario
| Scenario | ISO | Aperture | Shutter | Flash Power | Mode | Notes |
|---|---|---|---|---|---|---|
| Speech / keynote | 1600 | f/2.8 | 1/200s | 1/32–1/64 | TTL –0.7 EV | Bounce or off-camera side fill; avoid direct flash |
| Reception portrait | 1600–3200 | f/2.0–f/2.8 | — | 1/32–1/64 | TTL –1.0 EV | Half-CTO gel on flash; bounce off ceiling or wall |
| Dance floor | 800–1600 | f/2.8 | 1/60–1/80s | 1/64–1/128 | Manual | Drag shutter for ambient; off-camera rim lights at corners |
| Candid networking | 3200 | f/1.8–f/2.0 | — | Off or 1/128 | Ambient only or minimal fill | Fast prime; ambient-first; flash only if needed |
| Outdoor evening | — | f/2.8 | 1/100s | 1/32–1/64 | TTL –0.7 EV | Gel flash to match tungsten vendor lighting |
For ballroom and conference stage work, a shutter of 1/200s, aperture f/2.8, and ISO 1600 as a starting point is a reliable baseline. Push ISO higher as needed based on your sensor’s performance.
Lighting placement diagrams
Single on-camera bounce: Point the flash head at a 45-degree angle toward the ceiling and slightly behind you. The light returns with direction rather than falling flat on the subject’s face. Works well in rooms with white or light-colored ceilings under 12 feet.
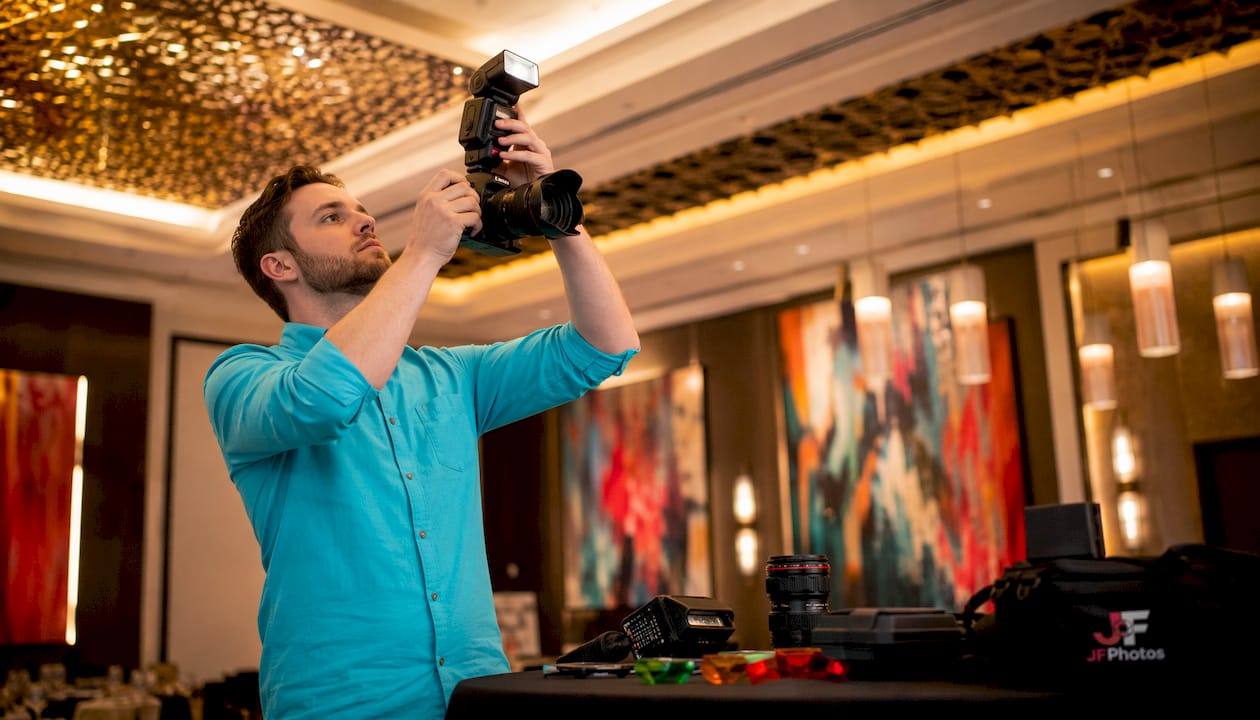
Single off-camera key + on-camera fill: Place the monolight or second speedlight at 45 degrees to the subject, slightly above eye level, at 1/4 to 1/2 power. Set on-camera flash to 1/128 as a subtle fill. This setup creates modeling and separation without looking theatrical.
Three-light room coverage: Position two speedlights on stands at opposite corners of the dance floor or reception area, aimed across the space at low power (1/32–1/64). Use on-camera flash as a third, low-power fill. The corner lights create rim separation on subjects throughout the room, and the on-camera fill handles close-range exposures.
Gels and color control
A half-CTO gel is the most versatile starting point for matching flash to mixed tungsten and LED indoor lighting. Carry quarter-CTO for subtle shifts and full-CTO for extreme tungsten environments. When you gel your flash to match the ambient, set your white balance to match the ambient temperature as well. The flash then reads as neutral, and the overall color balance stays consistent.
Pro Tip: Set your TTL compensation baseline at –0.7 to –1.0 EV as a starting point at every event. It prevents flash from overpowering the ambient and gives you a natural fill look. Adjust up only if subjects are underexposed in your test frames.
Before/after logic for small setting changes
Slowing your shutter from 1/200s to 1/80s at a reception keeps the warm ambient light in the background, making the room feel alive rather than black. Dropping flash power from 1/8 to 1/32 shifts the image from “flash-lit portrait” to “ambient scene with a well-exposed subject.” These are not dramatic changes in settings, but they produce dramatically different results.
How do you handle lighting for specific event scenarios?
Each scenario has a distinct lighting priority. Here are four concrete recipes.
Corporate stage and keynote
Spot-meter off the speaker’s face, not the stage background. Avoid on-camera flash during talks; it distracts the audience and creates harsh shadows on the podium. Instead, position an off-camera speedlight to the side of the stage at low power as a rim or side fill. Use 1/200s, f/2.8, ISO 1600 as a baseline and adjust ISO upward if the stage lighting is dim. Watch for mixed color temperatures between the stage spotlights and house lights; gel your fill flash to match the dominant stage color.
Reception and dance floor
Four-corner off-camera strobes at low power (1/64) create rim separation on dancers throughout the room. Set on-camera flash to 1/128 as a close-range fill. Drag the shutter to 1/60–1/80s to pull in the ambient atmosphere: string lights, uplighting, and candles stay visible in the background rather than going black. This is where lighting choices directly shape the emotional tone of the final images.
Outdoor evening
Use a bi-color LED panel for sit-down portraits and sponsor interviews where subjects are stationary. For moving subjects, switch to flash with a slow shutter (1/100s) to balance the ambient sky. Gel your flash to match tungsten vendor lighting if caterers or tent lighting are in the frame. Without a gel, your subject will read as cool blue against a warm background.
Headshot and photo booth
Two lights: a key light at 45 degrees above eye level at 1/2 power, and a fill at 1/4 power on the opposite side. Keep the power ratio at 2:1 for flattering, even coverage. Set a custom white balance before the first subject and lock it. If you are tethering for on-site proofing, this consistent setup means every frame needs minimal correction in post.
How do you work with clients, AV crews, and guests without disrupting the event?
Lighting gear draws attention. How you handle that attention determines whether you are seen as a professional asset or an obstacle.
Communication scripts that work
When approaching AV staff: “I’d like to place one light stand near the stage left perimeter during setup. I’ll have it secured and cabled before guests arrive. Is there a window in the run of show where I can do a quick test?”
When asking a venue coordinator for permission to use off-camera strobes: “I use low-power strobes on stands. They recycle quietly and I’ll keep them out of traffic paths. Can you confirm the circuit load limit for the area near the main entrance?”
When coordinating with a videographer: “My strobes fire at 1/200s. If your camera is rolling at 24fps, let me know and I’ll switch to HSS or drop to on-camera bounce so we don’t get flicker in your footage.”
Guest etiquette
- Stand to the side of the room during speeches, never between the speaker and the audience
- Step in for group photos quickly and step back out; do not linger in front of seated guests
- During ceremonies, move only during music or applause, never during vows or silent moments
- Keep light stands against walls or behind furniture; never in pedestrian paths
Safety checklist
- Tape all cables to the floor with gaffer tape before guests arrive
- Confirm the total wattage of your gear against the venue’s circuit capacity (a standard 15-amp circuit handles roughly 1,800 watts)
- Position light stands so they cannot be knocked over by a passing guest; use sandbags on the base when available
- Never aim a bare strobe directly at a speaker’s eyes or at a stage monitor
Fallback when off-camera strobes are blocked
Switch to on-camera bounce with a half-CTO gel and open your aperture to f/1.8 or f/2.0. Push ISO to 3200–6400 on a modern mirrorless body. This combination keeps images clean and natural-looking even without off-camera gear. The event photography coverage guide at JFPhotos covers additional fallback strategies for restricted venues.
Pro Tip: Always introduce yourself to the AV lead by name at the start of setup. A 60-second conversation at the beginning prevents a 10-minute conflict mid-event when you need to adjust a light placement.
How do you correct mixed lighting in post-processing?
Mixed lighting is more challenging than pure darkness. Setting a custom white balance or using manual Kelvin beats Auto WB for consistent galleries, but even with careful in-camera work, post-processing is where you lock in the final look.
The most reliable post-processing sequence for mixed-light events: correct exposure and contrast globally first, then set white balance per lighting zone, then apply local adjustments for faces and backgrounds, and finish with a light color grade to unify skin tones across the gallery. Doing it in any other order means you are correcting against a moving target.
Step-by-step correction order
- Exposure and contrast: Set global exposure, recover highlights, and lift shadows before touching white balance. A correct exposure makes WB decisions more accurate.
- White balance by zone: Sort your selects by lighting environment (main ballroom, registration area, outdoor terrace). Apply a single WB correction to the best-exposed frame in each group, then sync it across all frames from that zone.
- Local adjustments: Use the HSL panel or masking tools to correct skin tones independently from the background. This is especially useful when warm uplighting casts an orange tint on the background while your gelled flash kept the subject neutral.
- Color grade: Apply a light, consistent grade to unify the gallery. Keep it subtle; heavy grading amplifies any remaining color inconsistencies.
Practical tricks
Use your half-CTO reference frame from the scout as a starting WB anchor for tungsten-heavy zones. Copy that white balance setting across all similar-lit frames with a single sync command in Lightroom or Capture One. When a global WB shift would fix the background but push skin tones orange, use a local HSL adjustment on the orange channel instead of moving the global slider.
Set a white-balance policy for the gallery before you start editing: decide whether the final look will be warm, neutral, or cool, and apply it consistently. Clients notice when the first 20 images look warm and the next 20 look cool. Consistent WB is a deliverable quality signal. Name your files by zone (e.g., “CORP_BALLROOM_0001”) so you can batch-apply zone-specific corrections without hunting through a mixed timeline.
JFPhotos real-world setups: two case studies with timing and costs
These two setups reflect how JFPhotos approaches event lighting at corporate conferences and wedding receptions in the Phoenix, AZ area.
Case study 1: Corporate conference keynote
Scenario: 300-person ballroom, stage with LED spotlights at 4500K, warm tungsten house lights at 2800K, ceiling height 18 feet.
Gear used: Two speedlights (Godox V1), one AD200 Pro on a stand at stage left, half-CTO gels on all units, Godox X2T triggers, 24" softbox on the AD200 Pro.
Placement: AD200 Pro at stage left, aimed at the speaker’s face at 45 degrees. On-camera speedlight bounced toward the ceiling at 1/32 power as ambient fill. Second speedlight on a stand at the back of the room at 1/64 power for audience candids.
Settings: ISO 1600, f/2.8, 1/200s, AD200 Pro at 1/8 power, TTL –0.7 EV on on-camera unit.
Why we gelled: The stage LED spotlights read at 4500K. Ungelled flash at 5500K would have made the speaker’s face look noticeably cooler than the stage light. A half-CTO brought the flash to approximately 4200K, close enough to blend without a visible seam.
Case study 2: Wedding reception
Scenario: Indoor ballroom, warm Edison-bulb string lights at 2700K, colored LED uplighting, ceiling height 14 feet, dance floor 30x30 feet.
Gear used: Two speedlights on stands at opposite corners of the dance floor, one on-camera speedlight, half-CTO gels, Godox X2T triggers.
Placement: Corner speedlights at 1/64 power aimed across the dance floor for rim separation. On-camera speedlight at 1/128 power with half-CTO as close-range fill.
Settings: ISO 800–1600, f/2.8, 1/80s (drag shutter), corner lights at 1/64 manual.
| Setup | Crew | Setup Time | Budget Tier |
|---|---|---|---|
| Corporate keynote (3-light) | 1–2 photographers | 35–45 minutes | Prosumer (— owned gear) |
| Wedding reception (3-light) | 1 photographer | 20–30 minutes | Prosumer (— owned gear) |
| Full pro rental (large ballroom) | 2 photographers | 45–60 minutes | rental pricing |
Pro Tip: At JFPhotos, we always do a three-frame test sequence before guests arrive: one ambient-only frame, one with on-camera fill, and one with the full off-camera setup. Those three frames tell us exactly what to adjust before the event starts, not during it.
You can see how these setups translate to finished work on the JFPhotos event photography page.
Key Takeaways
Reliable event lighting comes down to one repeatable system: expose for the ambient, add gelled flash as fill, carry redundancy, and lock in white balance per zone before the first guest arrives.
| Point | Details |
|---|---|
| Expose ambient first | Start at ISO 1600–3200 with a wide aperture before adding any flash power. |
| Flash as gentle fill | Set TTL compensation to –0.7 to –1.0 EV; flash should lift the subject, not dominate the scene. |
| Gel to match | A half-CTO gel on every active flash prevents jarring blue skin tones in tungsten and warm LED environments. |
| Carry redundancy | Two speedlights, extra triggers, and spare batteries prevent single-point failures during long events. |
| JFPhotos approach | JFPhotos uses a three-light prosumer setup with pre-gelled speedlights and a zone-based WB policy for consistent, editorial-quality event coverage in Phoenix, AZ. |
What JFPhotos does differently with event lighting
Most photographers treat lighting as a technical problem to solve on arrival. At JFPhotos, we treat it as a pre-event decision that gets made during the scout, confirmed with the AV team, and locked in before the first guest walks through the door. The difference shows up in the final gallery.
The conventional advice is to “use bounce flash and keep ISO low.” That is correct as far as it goes, but it misses the real challenge: consistency across a four-hour event where the house lights dim three times, the DJ adds colored uplighting at 9 PM, and the venue switches from fluorescent overheads to candlelight for dinner. The photographers who produce consistent galleries are not the ones with the most expensive gear. They are the ones with a zone-based white balance policy, pre-gelled flashes, and a mental map of the room before the event starts.
At JFPhotos, with over a decade of experience covering weddings, corporate events, and editorial assignments in Arizona, the priority is always fastest reliable setup, not most impressive gear. Two speedlights, a battery monolight, and a solid gel kit cover 95% of event scenarios. The PPA and Imaging USA both emphasize that ongoing education in unpredictable lighting environments is what separates working professionals from hobbyists, and that philosophy drives how we approach every new venue.
The other thing most guides skip: communicate with the AV team before you need something from them. A 60-second introduction at setup creates a working relationship that pays off every time you need to adjust a light placement mid-event without disrupting the program.
Hire a photographer who handles lighting so you don’t have to
Lighting at events is complex, fast-moving, and unforgiving of mistakes. If you would rather focus on running a great event than managing a photographer’s lighting setup, JFPhotos handles everything: venue scouting, gear, on-site lighting execution, and post-processing with a consistent white-balance policy across the full gallery.
JFPhotos serves weddings, corporate events, galas, and receptions throughout Phoenix, AZ, with a portfolio that spans intimate ceremonies to 500-person conference keynotes. Quick turnaround times and professional editing are standard on every booking. Whether you need full event photography coverage or a dedicated wedding photographer who knows how to work with any venue’s lighting, the JFPhotos team is ready. Contact JFPhotos to check availability for your event date.
Useful sources and further reading
The sources below informed the techniques and recommendations throughout this guide. Each is worth bookmarking for deeper reference.
- Event Photography Lighting Tips: A Field Guide | TIME&SPACE — Practical field guidance on bounce flash, low-power fill, and redundancy. The most directly applicable reference for on-site technique decisions.
- How to Handle Difficult Lighting at Indoor Venues | FindMe Photo Blog — Covers the ambient-first workflow, half-CTO gel selection, and custom white balance strategies for mixed indoor lighting.
- Best Practices for Conference Photography Coverage | Event Photojournalism — Baseline camera settings for ballroom and conference stage work, plus white balance guidance for mixed-temperature environments.
- Event Photography Equipment Guide | TIME&SPACE — Covers continuous LED panels, flash redundancy, and gear selection for fast-paced event environments.
- Professional Photographers of America (PPA) — The leading professional organization for photographers in North America. Hosts training, certification programs, and the annual Imaging USA conference, which includes dedicated sessions on lighting mastery for event photographers.
- Imaging USA — PPA’s annual continuing education event. Sessions cover lighting, posing, business, and technical skills specifically for working photographers. Worth attending if you want structured training in unpredictable lighting environments.
- Tips for Event Photography Lighting | Event Photojournalism — Scenario-specific guidance for galas, conferences, and receptions, including flash power recommendations and common mistakes to avoid.
Recommended
Recent Posts