

Child Photography Milestone Ideas: Age-by-Age Guide
The most effective plan for capturing your child’s milestones is straightforward: photograph at newborn, 3 months, 6 months, 9 months, and 12 months during the first year, then add annual sessions at 18 months, 2 years, and each birthday or school year through age 9. Start with a smartphone, a window on your left or right, and one consistent prop you’ll use every single month. That combination, used by parents and professionals alike, produces a cohesive series that tells a real story of growth. Child photography age milestone ideas don’t require expensive gear or a studio. They require consistency, good timing, and a repeatable setup you can return to month after month.
Here’s how to get started today:
- Pick your backdrop. A plain white wall, a linen blanket spread on the floor, or a neutral-colored rug works well. A consistent backdrop and one repeatable prop produce a cohesive month-by-month series that makes growth visible at a glance.
- Choose one size-reference prop. A stuffed animal, a wooden block set, or a milestone card placed next to your child every month creates an instant visual comparison.
- Set a monthly calendar reminder. Schedule it for the same week each month, ideally a few days before or after the actual date so you have flexibility around naps and moods.
- Test your phone camera. Switch to Portrait mode for close-ups, enable burst mode for active shots, and tap the screen to lock exposure on your child’s face before shooting.
- Shoot within 30 minutes of a feeding and nap. That brief alert-but-settled window is when you’ll get the best expressions with the least effort.
Key Takeaways
Consistent setups, good timing, and age-specific prompts produce milestone photo series that parents return to for decades.
| Point | Details |
|---|---|
| Prioritize five key ages | Photograph at newborn, 3 months, 6 months, 9 months, and 12 months for a complete first-year series. |
| Use one consistent prop | A stuffed animal or milestone card used every month creates a compelling visual growth marker across the series. |
| Shoot with window side-lighting | Position your child so the window is to their left or right for soft, flattering light without harsh shadows. |
| Time sessions after feeding and naps | The alert-but-settled window after a nap and feeding typically produces the best expressions in the shortest time. |
| JFPhotos for professional sessions | JFPhotos offers tailored milestone portrait sessions in Phoenix, AZ, with safe newborn handling, consistent editing, and fast digital delivery. |
Table of Contents
- Why milestone photos are worth the effort
- What are the best child photography age milestone ideas by month?
- How do you get professional-looking photos with a smartphone?
- What props and outfits photograph best at each age?
- How do you prepare for a milestone photo session?
- How should you edit, store, and share milestone photos?
- When should you hire a professional photographer for milestones?
- What makes milestone photos genuinely meaningful?
- Professional milestone sessions with JFPhotos
- Sources
Why milestone photos are worth the effort
Milestone photos freeze a version of your child that will never exist again. The 6-month-old who just learned to sit, the 12-month-old taking a first step, the 3-year-old with a gap-toothed grin — these moments pass in days. A photo series that captures them becomes one of the most-referenced family heirlooms you’ll ever create.
The practical case is just as strong. Consistency is what makes the series work. When you use the same backdrop and prop every month, the photos read as a set, and the growth between frames becomes the story. Without that consistency, you have a collection of cute photos. With it, you have a timeline.
Child-development research supports specific timing, too. The American Academy of Pediatrics notes that a baby’s social smile typically appears by the end of month two and is reliably present by month three, making that window a natural target for smile-focused shots. Knowing when developmental leaps happen helps you plan sessions around what your child can actually do, not just how old they are.
What are the best child photography age milestone ideas by month?
The core approach: keep setups minimal and let the child’s developmental stage drive the shot. Newborns sleep and curl; 3-month-olds smile; 6-month-olds sit; 9-month-olds move; 12-month-olds show full personality. Each stage tells a different story, and your setup should reflect that.
Newborn (0–2 weeks)
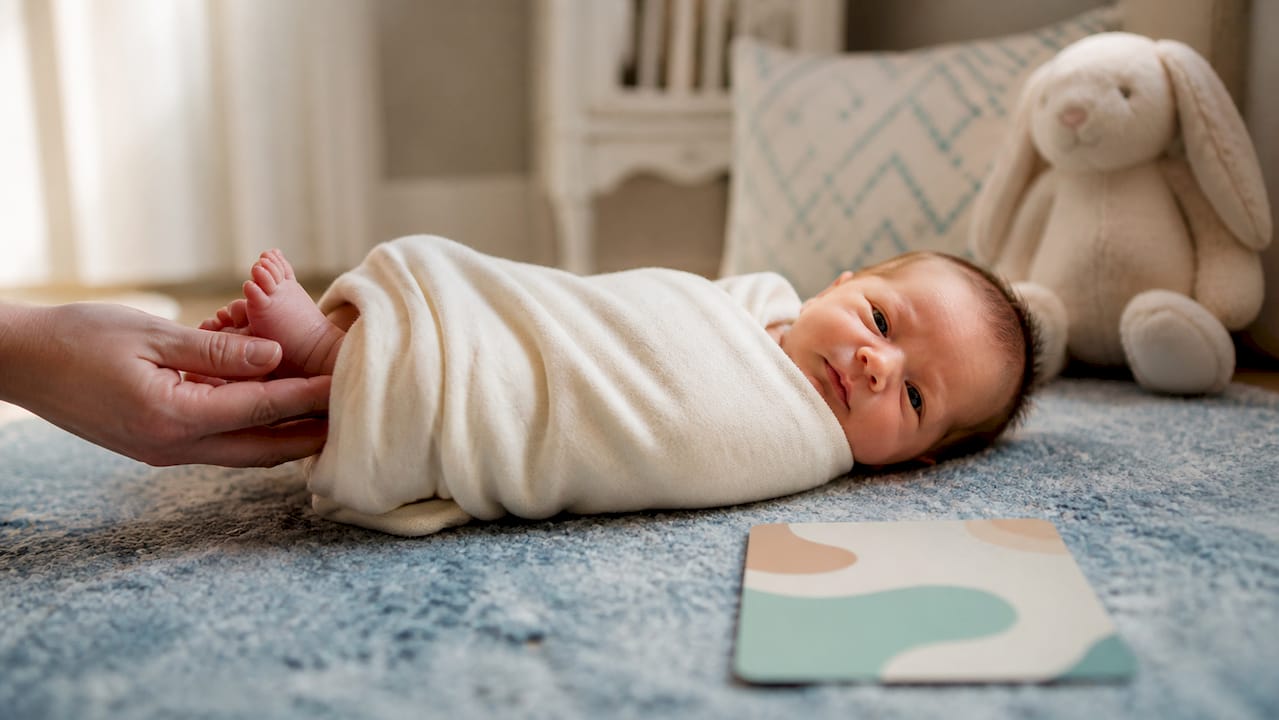
The classic curled newborn look has a tight window. Photographers recommend shooting within 5–14 days of birth to capture the natural curl and deep sleep poses. At home, keep it simple: swaddle your baby in a soft wrap, place them on a flat surface near a window, and shoot from above (flat-lay style) or at their level. Use a parent’s hands in the frame for scale. Safety note: never attempt unsupported poses. Any prop touching a newborn should be soft, flat, and free of loose parts.
Month 1
Your baby is still mostly sleeping. A milestone card placed beside them on a neutral blanket is all you need. Shoot from directly overhead for a clean flat-lay. This is the month to establish your consistent backdrop so every future photo matches.
Month 3
This is the smile month. A social smile is reliably present by month three, making it one of the most rewarding sessions of the first year. Place your baby on their back or in a slightly reclined position, get at their eye level, and talk to them. Burst mode will catch the grin. Props: milestone card, your consistent stuffed animal.
Statistic callout: Most babies develop their first genuine social smile between 6 and 8 weeks, with reliable, repeatable smiles appearing by 3 months — making Month 3 the ideal target for smile-focused milestone photos.
Months 4–6
Tummy time becomes a photo opportunity. By month 4, babies hold their heads up confidently; by month 6, many can sit with light support. Capture tummy time from the front to show that lifted head and curious expression. For the 6-month session, photographers commonly target this stage because independent sitting creates a natural, upright portrait. Use a Boppy pillow just out of frame for safety if needed.
Months 7–9
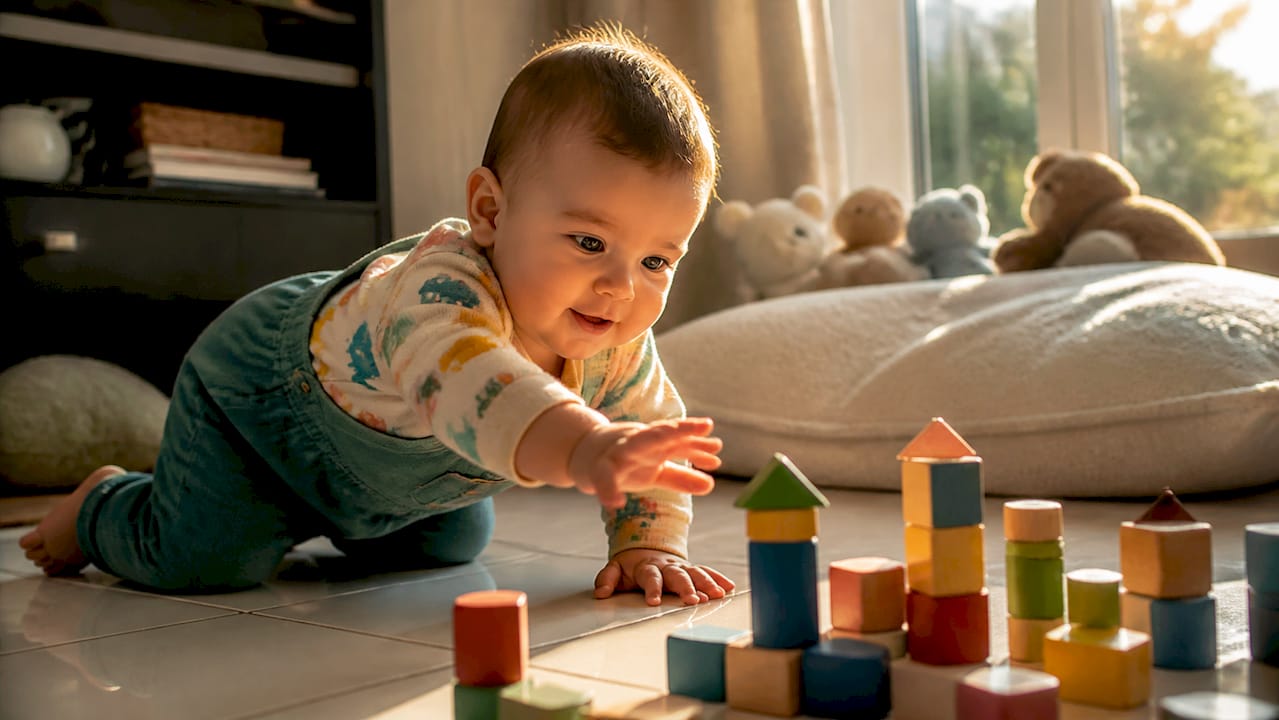
Movement enters the frame. Crawling, pulling up, and reaching are all fair game. Switch to burst mode and let your child move naturally. Shoot from their level on the floor. A wooden block tower they can knock over makes a great interactive prop. Safety note: always have a spotter within arm’s reach when a baby is sitting or pulling up near any prop.
Months 10–12
Personality is fully on display. Capture standing, cruising along furniture, and that first unsteady step. The 12-month session often includes a cake smash, which photographs best on a wipeable surface with a plain backdrop. Keep the cake simple and the background clean so the expression, not the mess, is the focus.
18–24 months
Toddlers move fast and cooperate rarely. Play-based prompts work far better than posed setups at this age. Give them a bubble wand, a favorite book, or a simple toy and photograph the interaction. Outdoor settings with natural textures (grass, a wooden bench, a garden path) add variety without requiring props.
Ages 3–5
This is the age for personality-driven shots. Ask them to show you their favorite toy, run toward you, or whisper a secret. Candid interaction produces far more authentic results than “say cheese.” Seasonal themes work well here: fall leaves, spring flowers, a winter coat and boots. Keep backgrounds simple so the child’s expression carries the frame.
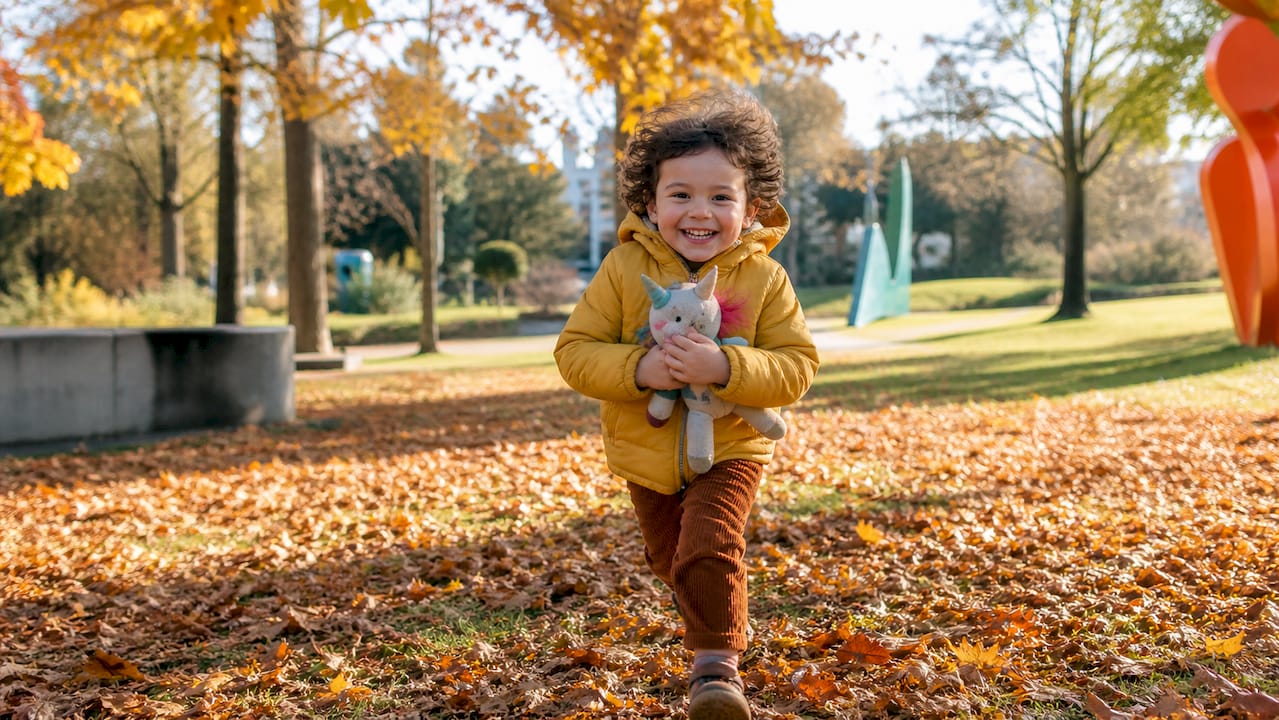
Ages 6–9 (school-age checkpoints)
Annual back-to-school photos and half-birthday sessions are natural markers. A chalkboard sign with the grade and age, a favorite book, or a sport-related prop all photograph cleanly. These sessions can be short — 10 to 15 minutes — because school-age children understand direction and can hold an expression briefly.
The table below gives you a quick reference for each stage:
| Age group | Shot type | Repeatable prop / size marker | Timing notes |
|---|---|---|---|
| Newborn (0–2 weeks) | Flat-lay, swaddled | Parent’s hands for scale | After feeding; deep sleep window |
| Month 3 | Eye-level smile | Stuffed animal + milestone card | 30 min after feeding, alert |
| Months 4–6 | Tummy time / sitting | Consistent stuffed animal | After nap, morning light |
| Months 7–9 | Crawling / action | Wooden blocks | After feeding, mid-morning |
| Months 10–12 | Standing / cake smash | Milestone number card | After nap, natural light |
| 18–24 months | Play-based candid | Favorite toy | After snack, outdoor setting |
| Ages 3–5 | Personality / seasonal | Seasonal prop (leaves, flowers) | Mid-morning or late afternoon |
| Ages 6–9 | School-age checkpoint | Chalkboard sign / grade marker | After school snack, good mood |
For a complete first-year series, follow these steps in order:
- Set up your consistent backdrop and choose your size-reference prop before the newborn session.
- Photograph at newborn, then set monthly reminders for months 1 through 12.
- At each session, shoot the prop-only frame first, then add your child.
- Capture at least 10–15 frames per session using burst mode.
- Select 2–3 favorites per month and store them in a dedicated folder labeled by month and year.
- At month 12, compile the full set into a collage or photo book.
A 12-month baby milestones checklist can help you track developmental skills alongside your photo plan, so each session captures what your child can actually do at that stage.
How do you get professional-looking photos with a smartphone?
Natural side-window light is the single fastest upgrade you can make. Place your child so the window is to their left or right, not behind them and not directly in front. Lucy Darling’s milestone photography guidance consistently points to this setup as the foundation for soft, flattering baby portraits. Overhead midday sun and direct flash both create harsh shadows that flatten features and age the image.
The best times to shoot at home are mid-morning and mid-afternoon, when light enters at a low angle and fills the room evenly without glare.
| Time window | Light quality | Notes |
|---|---|---|
| 9 AM to 10 AM | Soft, directional | Best for newborns and flat-lays |
| 2–4 PM | Warm, angled | Good for toddlers and outdoor sessions |
| Midday (12 PM to 1 PM) | Harsh, overhead | Avoid for portraits; creates unflattering shadows |
| Golden hour (1 hr before sunset) | Warm, diffused | Excellent for outdoor milestone sessions |
For smartphone settings, these adjustments make a real difference:
- Portrait mode: blurs the background and keeps your child sharp. Use it for close-up face shots.
- Burst mode: hold the shutter button to fire a rapid sequence. Essential for any child who moves.
- Exposure lock: tap and hold on your child’s face to lock focus and exposure before they move.
- Lens care: wipe the lens with a soft cloth before every session. A smudged lens is the most common cause of soft, hazy images.
For a deeper look at how light and exposure interact, the exposure triangle basics guide from JFPhotos breaks it down in plain language.
Pro Tip: Schedule your session for right after a feeding and a short nap, then shoot in bursts of 10–15 frames. You’ll often get the shot you want in the first five minutes — before the mood shifts. Delete the rejects immediately so you’re not sorting through hundreds of frames later.
What props and outfits photograph best at each age?
Choose one consistent size-reference prop and keep outfits simple and texture-forward. The child should always be the subject; props and clothing are supporting elements, not the focus.
Props that work across the first year:
- Milestone cards or number blocks: placed flat beside the baby or held up by a parent, these mark the month clearly and photograph cleanly.
- A stuffed animal: used every month, it becomes the most compelling visual growth marker in the series. Choose one that’s neutral in color and won’t compete with the child’s outfit.
- An heirloom blanket: soft texture reads beautifully in photos and adds warmth without clutter.
For seasonal variety, flat-lay setups with simple seasonal props are a low-cost way to keep the series fresh: spring florals, a small pumpkin in October, a cozy knit blanket in winter. The key is restraint. One seasonal element is enough. Two or three compete with your child’s face.
Outfit guidance:
Solid colors and soft textures photograph better than busy patterns. Avoid large logos, bright stripes, or anything that draws the eye away from the child’s expression. Coordinate with your backdrop: if your backdrop is white or cream, warm neutrals (dusty rose, sage, oatmeal) work well. If your backdrop is a darker texture, lighter outfits create natural contrast.
For more detailed outfit coordination advice, the JFPhotos family photography style guide covers color palettes, texture choices, and what to avoid for different ages and settings.
How do you prepare for a milestone photo session?
A short pre-shoot checklist prevents the most common pitfalls: a hungry baby, a cluttered backdrop, and a dead phone battery. Follow these steps before every session:
- Feed your child 20–30 minutes before shooting. A full baby is a calm baby.
- Let them nap first. The alert-but-settled window right after a nap is your best opportunity for genuine expressions.
- Set up your backdrop and props before you bring the child into the space. Fumbling with props while holding a baby costs you the mood window.
- Do a safety sweep. Remove any loose items, sharp edges, or unstable props from the shooting area.
- Charge your phone and clear storage space so you’re not interrupted mid-session.
- Recruit a spotter. For any session where your child is sitting, standing, or near a prop, have another adult within arm’s reach. This is non-negotiable for newborns and young babies.
- Take a test frame before the child is in position. Check exposure, focus, and background for distractions.
- Shoot your backup frames first. Capture the simple, safe shots before attempting anything more creative.
Session length varies by age. Newborn sessions can run 2–3 hours because of feeding and settling breaks. Baby sessions from 4–12 months work best in 15–20 minute windows. Toddler and preschool sessions are most productive when kept under 20 minutes, with play-based prompts rather than posed directions.
For newborn sessions specifically: never leave a baby unattended on any elevated surface, and avoid any prop that requires the baby to support their own weight. A spotter’s hands should be visible in the frame if needed and removed in editing later.
How should you edit, store, and share milestone photos?
Edit lightly, back up immediately, and share a compressed album for family while keeping originals in two separate locations. Heavy editing ages photos quickly; a light touch preserves them.
Simple editing workflow:
Mobile apps like Lightroom Mobile, Snapseed, and VSCO all offer one-tap presets that produce consistent results without a learning curve. A reliable edit sequence: crop to remove distractions, adjust exposure so the child’s face is correctly lit, add a touch of warmth, and apply gentle sharpening. That’s it. Resist the urge to add heavy filters or dramatic color shifts that will look dated in five years.
Storage and backup:
Keep originals in two places: one local (an external hard drive or your computer) and one cloud-based (Google Photos, iCloud, or Amazon Photos). Name your folders consistently: “2026_01_Baby_Name” for January, “2026_02_Baby_Name” for February, and so on. That naming convention makes it easy to pull the full year’s set when you’re ready to create a collage or photo book.
Printing:
A printed photo book at the end of the first year is one of the most tangible ways to make the series real. Services like Artifact Uprising and Chatbooks accept digital files and produce quality prints. Order a small test print before committing to a full book to check color accuracy.
Sharing:
Create a shared album in Google Photos or iCloud and invite family members. Share compressed versions for social media; always keep the full-resolution originals separate and unedited.
When should you hire a professional photographer for milestones?
Hire a professional when you want heirloom-quality images, guaranteed safe handling, or a stress-free experience for the sessions that matter most. The three sessions most parents choose to book with a pro are newborn, 6 months, and first birthday.
Questions to ask before booking:
- Do you have specific experience with newborn safety and posing?
- What is your turnaround time for edited images?
- Do you offer print products, or do you deliver digital files only?
- What rights do I have to the images for personal printing?
- Are you insured, and what is your policy if a session needs to be rescheduled?
A professional brings things that are genuinely difficult to replicate at home: consistent editing across every session so the series looks cohesive, safe newborn handling with proper training, styling guidance for outfits and props, and high-resolution files suitable for large prints. Photographers who specialize in milestone sessions typically structure their packages around developmental stages, so the session plan matches what your child can do at that age.
Booking timeline:
Book a newborn session during your third trimester. Newborn availability fills quickly, and you want the session confirmed before the baby arrives. For 6-month and first-birthday sessions, book 4–6 weeks in advance, especially during peak seasons (spring and fall in most North American markets). A baby milestone tracker can help you plan which sessions to prioritize and when to start the booking conversation.
What makes milestone photos genuinely meaningful?
The most meaningful milestone photos are the ones that honestly capture personality, not perfect setups. A slightly blurry frame of a baby mid-laugh will outlast a technically perfect shot of a posed, unsmiling child every time.
After working with families across many stages and ages, the pattern is consistent: the parents who treasure their milestone series most are the ones who kept it simple and kept it going. One prop. One backdrop. One good window. Month after month. The imperfect frames, the ones where the baby is mid-sneeze or the toddler is looking the wrong way, often become the favorites because they’re honest.
Pick one motif that will carry through the years. It might be a specific blanket, a wooden letter, or a stuffed animal that appears in every photo from month one through age five. That single thread, repeated, becomes the visual spine of the series. Years from now, it’s the detail that makes the whole set feel intentional.
Professional milestone sessions with JFPhotos
JFPhotos offers portrait and milestone photography sessions tailored to each child’s age and your family’s specific needs, from newborn through school age.
Every session includes styling guidance so you arrive prepared, safe and experienced handling for newborns, consistent professional editing across sessions, and fast digital delivery with high-resolution files ready for printing. JFPhotos serves families throughout the Phoenix, Arizona area and beyond, with a portfolio that reflects a wide range of ages, settings, and styles.
If you’re planning a newborn, 6-month, or first-birthday session, now is the right time to check availability. Book your milestone session or get in touch with the JFPhotos team at Jf to discuss which sessions fit your child’s stage and your family’s timeline.
Sources
The lighting, timing, and month-by-month recommendations in this guide draw from the following resources:
Recommended
Recent Posts